Guide: Gas-Charged Prop for Engine Lid
Date: August 15th, 2004
Cost: $60
Time: 5 minutes
Supplies
- 14mm Wrench
- 10mm Wrench
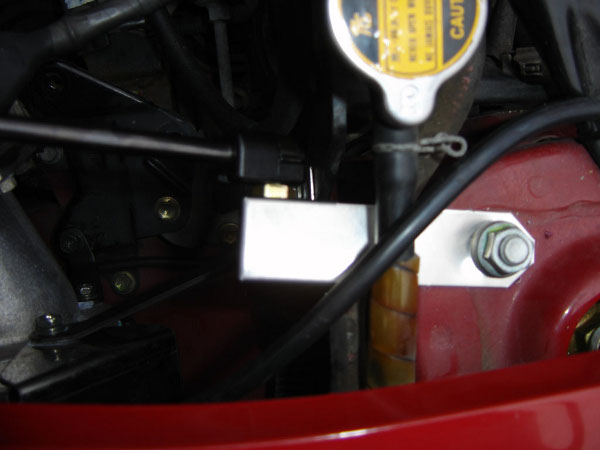
Steps
Remove the 14mm strut tower nut closest to the front on the driver's side. Remove the 10mm screw on the radiator filler (if you have an A'PEXi intake, this is where one of the brackets goes; put the lid prop bracket under the A'PEXi one). If you are not sure what I am referring to, the screw (looking from the driver's side of the engine) is to the left a couple of inches and down from the previous nut. Just test fit the bracket, and you should be able to see where it is supposed to connect. Put the bracket on and tighten the screw and nut.
On the engine lid, remove one of the 10mm screws and hand-tighten it over the new bracket. These screws are at the bottom left of the lid when it is open. The bracket shape makes the position pretty obvious. Remove the other screw and twist the bracket into place. Tighten both screws. You may have to wiggle the lid slightly to make them fit well again.

Look everything over and install the rod. Test it out a few times and make any final adjustments to ensure the lid closes and opens properly.